


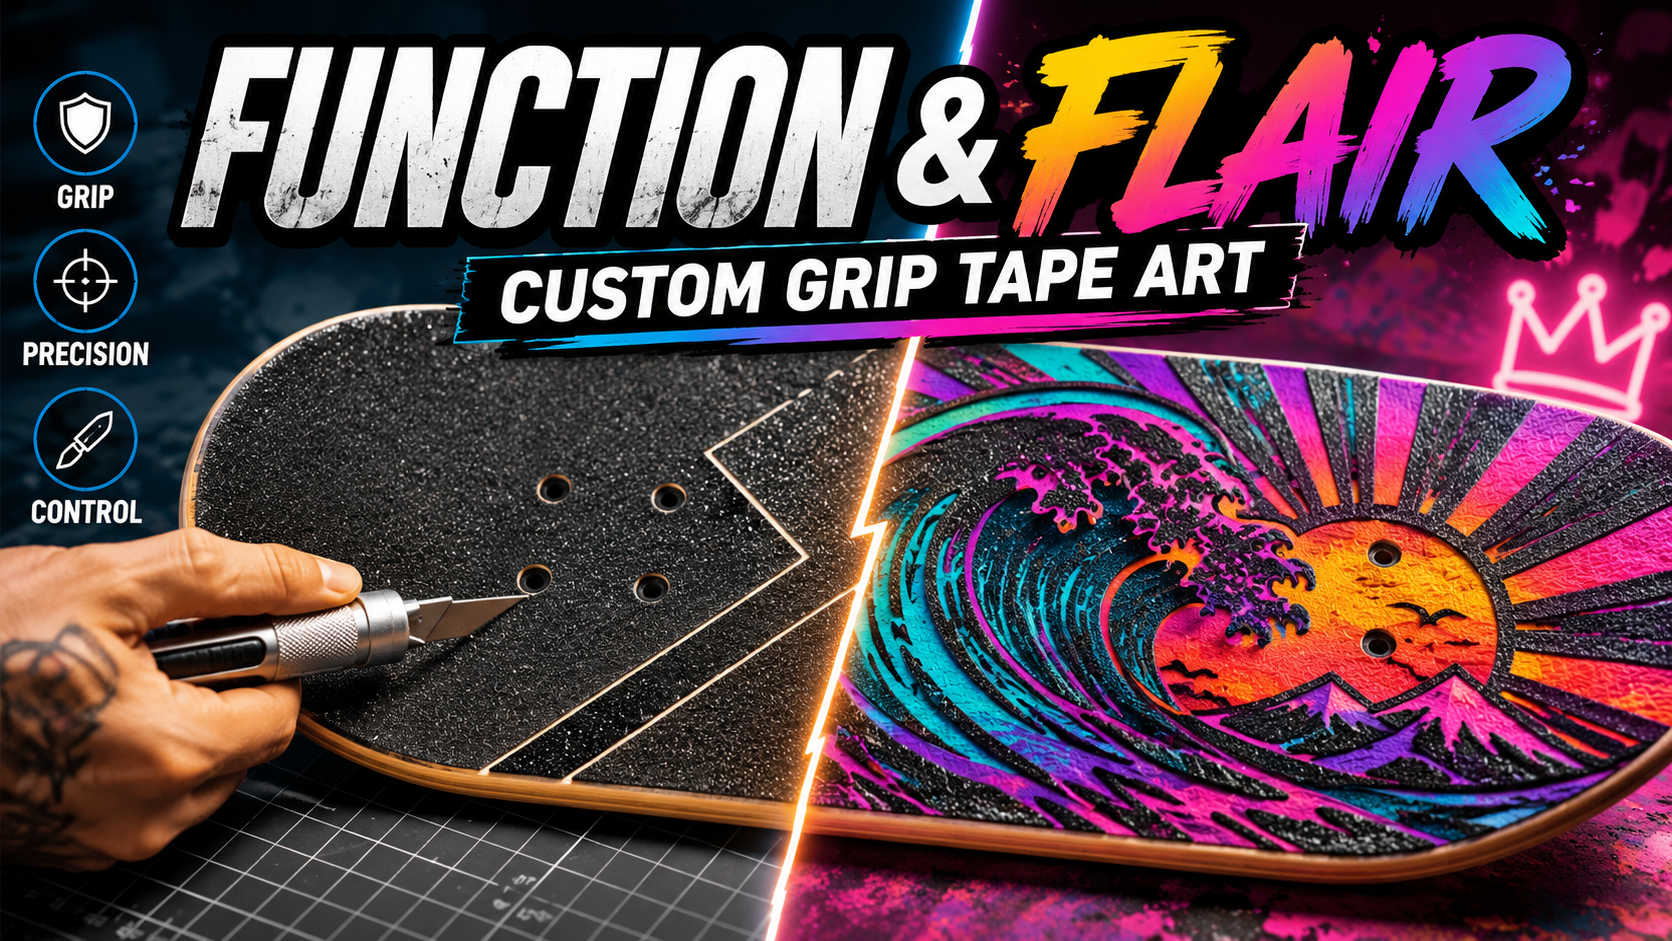
Custom Grip Tape Art: The Function & Flair Guide
Grip tape is the literal foundation of your connection to your deck. Whether you’re setting up a fresh street scooter deck from Aztek or refreshing your favorite setup, a sheet of grip tape is a blank canvas.
While its primary job is to keep your feet locked down, custom grip tape art allows you to add serious personality to your ride. But did you know that custom cutouts can actually make you a better rider?
At SkatesUSA, we believe your gear should look as good as it performs. This step-by-step guide covers how to design and apply custom grip tape art without air bubbles, and how to use "functional flair" to master your foot placement.
The Power of "Functional Flair"
Custom grip cuts aren't just for aesthetics. Professional street and park riders use strategic gaps in their grip tape as visual markers.
-
The Stance Indicator: Leaving a thin 2mm gap of exposed deck right where your front or back foot belongs gives you an instant split-second visual cue when landing a trick blind.
-
The Tail/Nose Marker: Cutting a small shape (like a triangle or a bar) near the front of your deck ensures you never accidentally look down and confuse the front of your setup with the back.
-
Weight Reduction: For weight-conscious park scooter riders, cutting clean geometric patterns out of the center removes excess material, shaving off precious grams from your build.
Tools for the Job
Before you peel back the liner, gather these essential workshop tools:
-
A fresh sheet of premium grip tape (like Mob, Jessup, or Hella Grip)
-
A razor-sharp utility knife or box cutter
-
A heavy-duty screwdriver or a metal file (for scoring the edges)
-
A cutting mat or thick cardboard
-
A standard pin or needle (to pop stubborn air bubbles)
-
A metallic silver sharpie or paint pen (for drawing your design on the backing)
Step-by-Step Guide to Custom Grip Tape Art
Step 1: Prep Your Canvas
Never apply new grip over old, peeling tape. Use a hair dryer to heat up your old grip tape, peel it off slowly, and use rubbing alcohol to clean any leftover sticky residue from the deck. The surface must be completely clean and dry.
Step 2: Sketch the Backing (Reverse Your Design!)
Place your grip tape sheet face down on your cutting mat. Use your paint pen to draw your geometric patterns, lines, or shapes on the paper backing.
CRITICAL WARNING: Because you are drawing on the back of the sheet, your final design will be mirrored when flipped over. If you are cutting out text or asymmetrical shapes, you must draw them in reverse on the backing!
Step 3: Make Your Precision Cuts
Using your utility knife, carefully cut out your shapes on the cutting mat. Keep your blade at a 45-degree angle for clean lines. If you are doing simple line strips or a split-sheet design, a straight metal ruler is your best friend. Save the cutout scraps—you can use small pieces later to add accents.
Step 4: Lay Down the Main Sheets
Peel away the paper backing of your largest grip section. Hold it by the edges, curve it slightly into a "U" shape, and lower the center of the sheet onto the middle of the deck first. Slowly lay the edges down outwards. This technique pushes the air out to the sides, minimizing bubbles. Repeat this for your custom accent pieces, leaving neat 2mm to 5mm gaps between the sheets to show off your deck's raw metal or paint underneath.
Step 5: Score and Trim the Edges
Take your heavy-duty screwdriver and rub the metal shaft firmly along the entire edge of your deck. This creates a distinct, solid white outline through the grit. This outline acts as a perfect track for your blade. Take your utility knife, angle it inward at a 45-degree angle, and slice smoothly along the scored line to remove the excess overhang.
Step 6: Roll Out the Bubbles
Take the leftover smooth paper backing you peeled off earlier, place it over your fresh grip art, and press down firmly with your hands or a roller to seal the adhesive. If you spot a stubborn air bubble, prick it with your pin right in the center and smooth the air out through the tiny hole.
Rider Note: Take your time during the cutting process. A rushed grip job peels quickly and looks messy, but a patient, precise layout creates a setup that people will stop and stare at in the park line.
Ready to customize your ride? Browse our massive collection of high-performance Grip Tape Sheets and premium Decks at SkatesUSA to start planning your next masterpiece.