


Locked In: The Essential Guide to the Anti-Rocker Setup

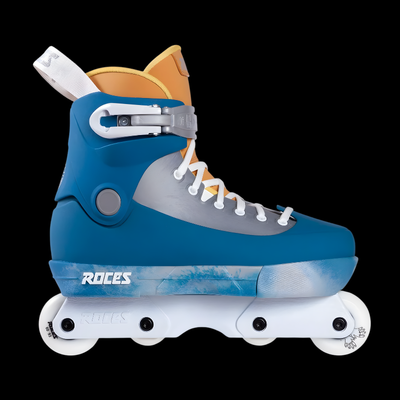
If you’ve just picked up your first pair of aggressive inline skates maybe some Roces M12s or USD Sway 2026s from SkatesUSA you probably noticed something strange about the wheels. On many models, the middle two wheels are tiny, rock-hard, and don't even touch the ground.
This isn’t a design flaw; it’s the Anti-Rocker setup.
While some advanced skaters prefer a "Flat" setup (all four wheels down), the overwhelming majority of aggressive skaters start with Anti-Rocker for one simple reason: It makes learning to grind infinitely easier. This guide breaks down why it works, how to set it up, and why it’s the key to unlocking your progression.
1. The Anatomy: What are Anti-Rocker Wheels?
A standard aggressive wheel is usually 57mm–60mm and made of "grippy" urethane (around 90A hardness).
Anti-rocker wheels are different:
-
Size: They are much smaller, typically 45mm–50mm.
-
Hardness: They are extremely hard (often 101A or solid plastic/nylon).
-
Function: They are designed not to spin easily or grip the ground. Their sole purpose is to act as a sliding surface.
2. The Benefits: Why Should You Ride Anti-Rocker?
If you're trying to learn a Frontside, Royale, or Soul Grind, the Anti-Rocker setup is your best friend.
Massive Grind Space (The "H-Block")
Grinding happens on the H-Block, the plastic bridge in the center of your frame.
-
With 4 wheels down (Flat): The space between the middle two wheels is narrow. If you miss the H-block by just a few millimeters, your middle wheels hit the ledge. This is called "Wheel Bite," and it will stop you instantly, usually sending you to the ground.
-
With Anti-Rockers: By shrinking the middle wheels, you create a massive, 4-inch wide plastic sliding "channel." You can miss your lock-on point completely and still slide smoothly on the hard anti-rocker wheels.
Stability on the Grind
When you are locked into a royale or groove trick, the hard anti-rocker wheels "catch" the rail or ledge, acting like stabilisers. This allows you to lean further into the trick without slipping out, helping you find your balance point.
3. The Compromise (The "Trade-Offs")
There is no "perfect" setup. By choosing Anti-Rocker, you do sacrifice a few things:
-
Turning Radius: Because you only have two wheels touching the ground on each skate (four total), your turning is less responsive. Carving tight bowls will feel different.
-
Speed & Smoothness: A Flat setup is faster and smoother because the impact is spread across 8 wheels. Anti-Rocker can feel "clunky" on rough asphalt.
The SkatesUSA Setup Guide
If your skates came "Flat" and you want to convert them, here is how:
The Hardware Checklist:
-
4x Aggressive wheels (your current outside wheels)
-
4x Anti-Rocker wheels
-
Crucial: Check if your anti-rocker wheels require bearings. Some (like older Ground Control versions) just slip over the axle; most modern versions require bearings and spacers.
The Swap:
-
Remove all four wheels. Clean your axles.
-
Install your 57mm–60mm wheels in positions 1 and 4 (the very front and very back).
-
Install your hard Anti-Rocker wheels in positions 2 and 3 (the middle slots).
-
Ensure all axle bolts are tight. A drop of blue thread-locker on the threads will prevent the axles from rattling loose.
Rider Note: Progression in aggressive skating is about removing barriers. Don't fight "wheel bite" while you are still trying to learn how to hop. Swapping to Anti-Rocker will build your confidence faster than any other hardware change. Once you have your grinds mastered, then you can try the speed of a Flat setup.
Ready to slide? Browse our full selection of Aggressive Frames and Anti-Rocker Wheels to build your perfect grind setup.